 |
Step-by-Step Instructions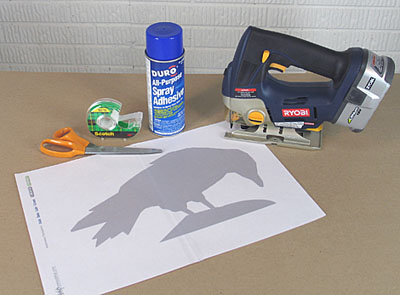
Getting Started: Tools & Materials
Tools:
- Jigsaw
- Circular Saw
- Drill
- Clamps
Materials
- 1/4" hardboard
- Spray Adhesive
- Wood Glue
- Chalkboard Paint
How to Make the Templates
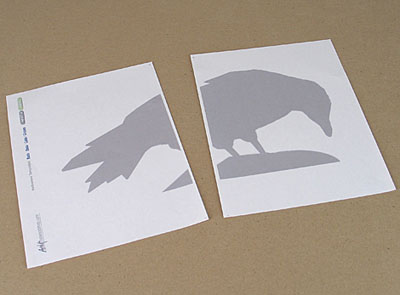
- Download and Print Templates—If you haven't done so already, download and print the templates for this project. Most of the templates stretch across two or more sheets of letter-size paper, which you'll tape together to make the full size image.
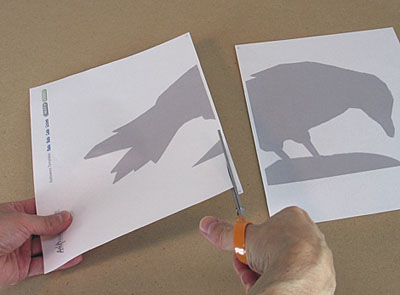
- Trim One Side—Most home printers will leave a small white border on the edges of the page. Remove this border (on one side of the template) before you assemble and tape the pages together.
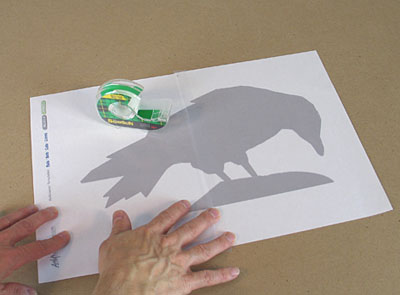
- Tape Pages Together—Line up the two sheets of paper side by side to make the image complete. Place a strip of tape across the entire width of the page.
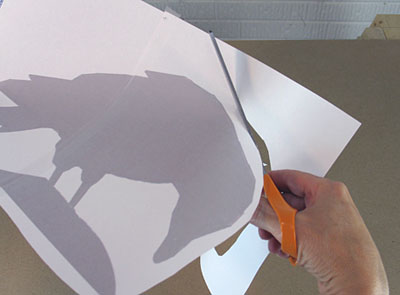
- Cut out basic shape—Remove some of the extra paper around the image. Go in about 1/2" from the edge.
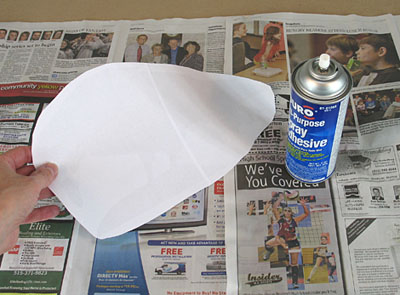
- Make the template sticky. Apply spray adhesive on the back of the template. This will keep the paper in place on the board. Don't worry about getting too much glue here - if you spray the paper only (not the board), you'll be able to easily peel the paper off later.
How to Cut the Templates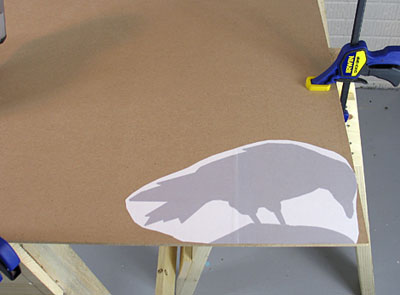
- Start at a corner—Find a smooth clean corner of your hardboard and stick the template in place. I like to use a pair of sawhorses and a couple of clamps to support the hardboard for cutting.
- Take multiple swipes—A jigsaw can make some pretty tight turns, but a few corners in these templates might be too sharp to follow with in one path. The solution is to make several cutting paths leading into the corner you need to remove. Then back the saw out and start in from another angle to finish the cut. With a little patience, you'll get the hang of how to do this.
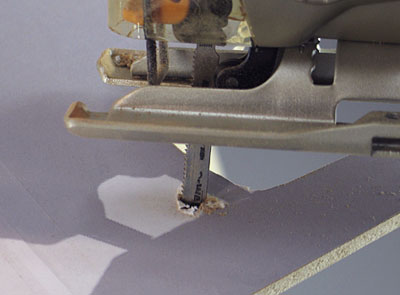
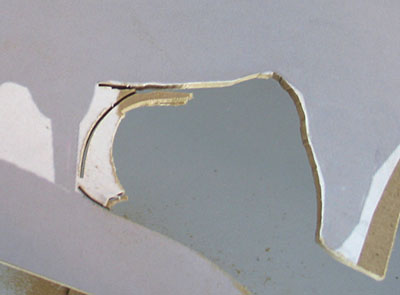
- Removing inside holes—
If your template has an enclosed area that needs removed, you'll have to provide a hole for your jigsaw to enter that spot. One quick way to do this is to drill a hole with a large-size bit. Next slip your jigsaw blade through the pilot hole you just drilled. From here you can start a new cutting path to remove the enclosed shape.
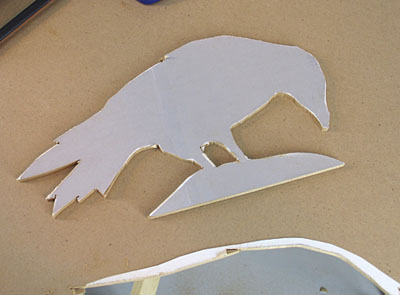
- Rough cut complete—At this point, your creepy crow should look something like this. Don't worry about the rough edges, we'll smooth those out in the next step.

- Smooth up the edges—Go ahead and peel off the paper. We won't need that anymore. Then use a small piece of sandpaper to smooth out the edges around the crow. If some spots are especially rough, you might try using a wood file or rasp.
How to Make the Base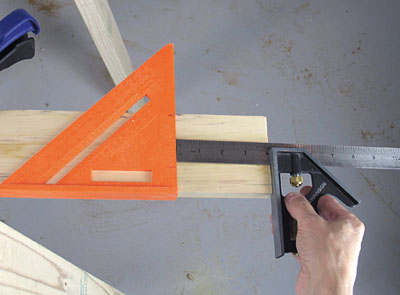
Now we need to make a small square-shaped base to keep the crow sanding upright. A 1x4 pine board works great for making the bases. Cut a 4" section for each crow you want to build. I used an inexpensive speed square for drawing cut. 
- Cut base—With the 1x4 board securely clamped, line up your circular saw blade to the cut line. Use the speed square to guide the saw across the width of the board.
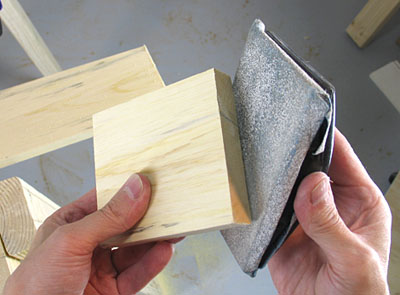
- Smooth the edges of the base—This is a good time to smooth out the edges of the bases. No need to go overboard here. We just want to dull the sharp edge left by the saw blade.
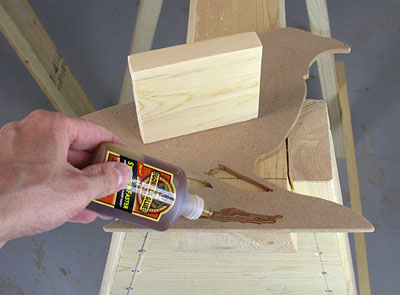
- Start the glue up—Just about any type of glue will do the trick here. Just keep in mind that some "super-strength" wood glues have a tendency to foam up and expand while they dry. This means a tight clamp is necessary to keep everything together. Keep in mind that the base goes behind the crow - so decide now which side of the crow you want to show from the front. Apply glue to both surfaces.
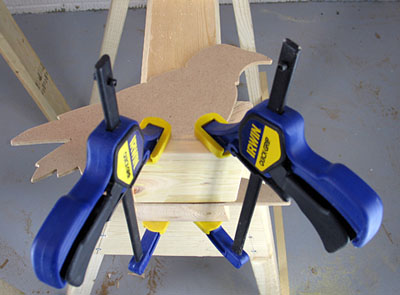
- Clamp down—A couple of Irwin Quick Grips and a sawhorse make a nice clamping station for attaching the base to the body of the crow. Check the instructions with your particular glue to find out how long to keep the clamps in place.
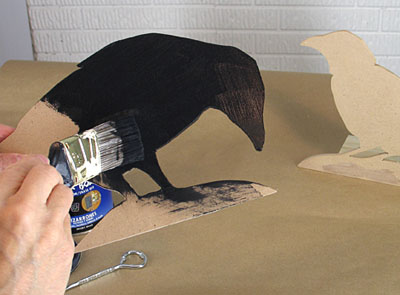
- Ready for painting—I used "chalkboard" paint with my creepy crows. This gives me a deep, slate-colored finish that works perfect for adding a few artistic details later on. The paint goes on fairly thick, and will usually cover material like hardboard in one coat.
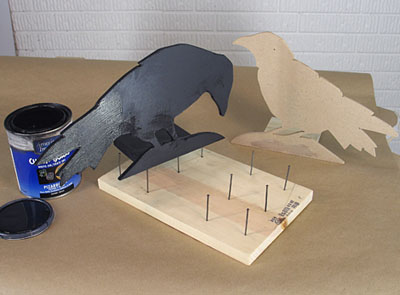
- Wait to dry—I like to get all sides of a board painted at the same time, which can be tricky if you don'[t have some way to hold your workpiece up off the table. I made this simple painting stand by driving a few rows of nails into a pine board.
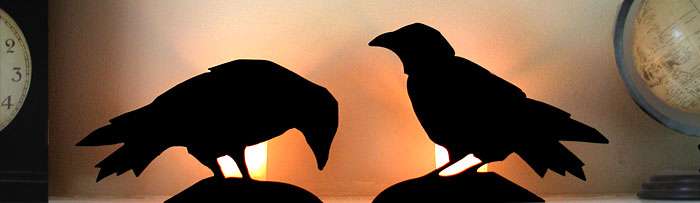
Add Background Lighting
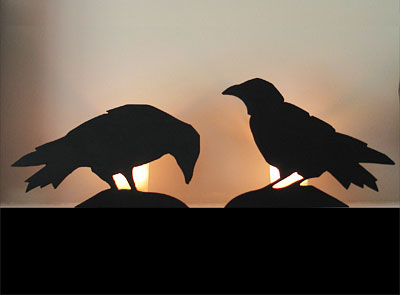
What really brings these creepy crows to life is a small light placed directly behind the figures - on top of the base we just created. We don't want to start any fires, so to be completely safe you might consider some alternatives to candles, like battery-operated LED candles.
|
What You Get
— Rat templates ( 3 different styles)
— Bat templates (2 different styles)
— Black cat templates (3 different styles)
— Black crow templates (2
different styles)
Realistic Drawings
No "cute" Halloween templates here.
These drawings resemble the real thing - which
adds a nice effect when backlit with LED
candles. I especially like to place the
rat silhouettes along the baseboard near the
stairs. The bats are perfect for hanging from
the ceiling.
No photo - copies - No Grids
Most project templates you'll find on the
Web have to be enlarged on a copy machine
- or redrawn on a board using a complicated
grid system. I avoided all that hassle by
creating full-size images that you'll print in sections - and then reassemble
directly on top of the board to be cut. No
photo - copies, no drawings, no grids. |